cricket

Sunday, January 29, 2017

Greentel GT-210 Firmware 100%


MT6572 Greentel GT-210 Firmware
Contact - +94 0767724040


Wednesday, January 25, 2017

Samsung SGH-T599 successfully Unlock ZAKIR GSM

Platform: Samsung Android
Selected port: COM28
Selected model: SGH-T599
Searching for a phone. Please wait...
Phone found.
Detected phone model: SGH-T599
Firmware compiled date: Thu Aug 27 14:46:06 KST 2015
PDA version: T599UVAOH1
CSC version: T599TMBAOH1
SW version: T599UVAOH1
Phone IMEI: 359640050318989
Phone SN: R21DB5X548Y
Android version: 4.1.2 (JZO54K)
Sales code: TMB
Country: USA
HW platform: montblanc
HW Chip: unknown
HW Modem: DB8520H
Codename: codinatmo
Unlocking phone...
Reading data from phone...
Cheking Root
Phone is Rooted
Data read successfully.
Please conect phone to BOX via UART cable.
Searching for a phone. Please wait...
Phone found.
Unlocking phone. This can take some time. Please wait...
Please insert card into phone, if phone is locked, then type 00000000
Phone is successfully unlocked
Performed by 2.4.7 Software version.

 Samsung SGH-T599 unlock done
ولا حول ولا قوة إلا بالله العلي العظيم
සකීර් GSM ජංගම දුරකථනය අළුත්වැඩියාව
#zakirgsm (+94) 0767724040
https://www.facebook.com/zakirgsm.lk/

Tuesday, January 10, 2017

ZAKIR GSM android apk

ZAKIR GSM android apk

Saturday, December 3, 2016

SAMSUNG J120F (J1 2016) BYPASS FRP REMOVE GOOGLE ACCOUNT

      Quickshortcutmaker apk Download.zakirgsm


Friday, November 25, 2016

SAMSUNG 2016 FRP GOOGLE ACCOUNT SOLUTION

SAMSUNG 2016 FRP GOOGLE ACCOUNT SOLUTION 

HERE IS SOME MODELS FRP GOOGLE ACCOUNT BYPASS FILES ARE AVAILABLE 


many More files are available for frp just write in comments what file you need 
but its all paid files 
its 100% working frp removal files
frp removal guide
1 flash this file after flash hard reset phone by useing buttons 
2 now use side sync method install samsung bypass.apk 
3 go to setting press build number 7 time 
4 go in developer option on OEM button 
5 now reset from setting .phone will reboot and frp remove done 
6 after this you can face .unfortunately ,or stop stop error but don,t worry
if you face this issue flash phone with latest firmware .
all is done 

here is side sync method and and samsung bypass apk 
copy this link and past in your browser 
https://www.youtube.com/watch?v=n_SYKj7WXgU

here is new 2016 frp google account solution solution video guide
https://www.youtube.com/watch?v=8sybmefxfLQ

Huawei google verify account bypass lollipop 5.1.1

    1. Software environment
<1> Install USB driver
<2> Apply to windows XP、WIN7.
<3> It just support only one phone,you can‘t connect more than one phone every time.
<4> software install: Just uncompress the file to your PC, and then you can use it.

    1. Switch the phone to fastboot mode
Push the button “Volume down” firstly, at the same time,
connect the phone to PC by USB  port(or push the power button) .
Release the volume down key after the mobile phone shake,
and the phone can go into fastboot mode.

    1. Unlock the phone by FRP Unlock Key
The mobile phone can be unlocked by FRP unlock key, If in the FASTBOOT state.
Operate as the fllowing:
  1. Input the 16 bits FRP unlock key.
  2. Click the button “unlockByKey”
  3. The phone will reboot if unlock successfully.
You can’t close the software when the operation is in progress.
If the phone is successfully unlocked, the interface will show FRP UNLOCK SUCCESS
IF not success then

  1. Click the button “Erase FRP ”
  2. its 10000000% success

Tools download click here Download
password - zakirgsm
Mobile +94767724040

Saturday, March 12, 2016

iphone 5s this accessory may not be supported solution 100% Done


Thursday, February 25, 2016

Samsung A5 Touchpad ways

Samsung A5 Touchscreen problem Done 
1st Chack cap     C6016 - 3.3V


Saturday, January 16, 2016

Samsung S5 Backlight problem ways


Friday, January 8, 2016

Zakir gsm


Thursday, January 7, 2016

Xperia Z camera unfortunately error, camera failed solution


Tuesday, January 5, 2016

Iphone 4 front camera problem solution

iphone 4 Front  camera  problem  Done


Sunday, January 3, 2016

Bypass any Samsung Google verify account

Bypass any Samsung Google verify account only 

pls first look out this post those phone contain 5.0.0 or lower version.

ALL}-Samsung Account Simple Method
this software just for update like 5.1.1 upper version work.

this is tested over 100 %


Download Link

what you need?
1.my software
2.otg cable
3.same as same issue phone


note that the software unable to bypass samsung account.
don't ask me for that.it is just for bypass google verification.because i clear everything here.

how to use?
1.simple brain
2.put the file on pendrive
3.power on phone
4.connect the pendrive through otg cable
5.now you will see file manager
6.install the software
7.then you will automatic promoted to settings
8. make reset from settings
9.wait to restart phone
10.now setup as new phone

Friday, January 1, 2016

CS-Tool For ALL MTK/ Spreadtrum

Download CS-Tool For ALL MTK/ Spreadtrum Mobile Best Flashing Software


CS-Tool Dongle latest update version v1.37 is released (09/10/15) and now CS-ToolDongle software full installer for windows is ready to direct download from its officialdownload link. If you are not downloading CS-Tool Dongle new updated version on your windows, then your are missing its latest features which are introduced in this latest version of CS-Tool Dongle software. If you want to download CS-Tool Dongle new version for free and without waiting, then click the link below. Downloading link is provided at the bottom of this page.

CS-Tool Dongle support All Chinese Android Smart Phone, mtk spd cpu flash, format, read pattern lock, unlock You can easy use to the tool 


CS-Tool Dongle New Features: 

Read Phone HW/SW InfoRead Full firmware [Including user Content]Write Full FirmwareFormat phoneFactory Default settingsImei RepairNetwork Lock [MTk65XX CPU based phones]Read phones locksReset phone locksRead/write Flash upto 64GBLargest Support zone for Offical Firmware Collections most wanted brands


Supported CPU:

MTK Smart Phones
  • MT6571 – Read / Write Flash, Format, IMEI repair, Read/Reset pattern lock, other miscellaneous options
  • MT6572 – Read / Write Flash, Format, IMEI repair, Read/Reset pattern lock, Network unlock, other miscellaneous options
  • MT6573 – Read / Write Flash, Format, IMEI repair, Read/Reset pattern lock, Network unlock, other miscellaneous options
  • MT6575 – Read / Write Flash, Format, IMEI repair, Read/Reset pattern lock, Network unlock, other miscellaneous options
  • MT6577 – Read / Write Flash, Format, IMEI repair, Read/Reset pattern lock, Network unlock, other miscellaneous options
  • MT6582 – Read / Write Flash, Format, IMEI repair, Read/Reset pattern lock, Network unlock, other miscellaneous options
  • MT6583 – Read / Write Flash, Format, IMEI repair, Read/Reset pattern lock, Network unlock, other miscellaneous options
  • MT6589 – Read / Write Flash, Format, IMEI repair, Read/Reset pattern lock, Network unlock, other miscellaneous options
  • MT6592 – Read / Write Flash, Format, IMEI repair, Read/Reset pattern lock, Network unlock, other miscellaneous options
  • MT6595 – Read / Write Flash, Format, IMEI repair, Read/Reset pattern lock, Network unlock, other miscellaneous options
  • MT6732 – Read / Write Flash, Format, IMEI repair, Read/Reset pattern lock, other miscellaneous options
  • MT6752 – Read / Write Flash, Format, IMEI repair, Read/Reset pattern Lock, other miscellaneous options
  • MT6795 – Helio X10 64Bit World First Support
MTK Features phones
  • New models:
    • MTK6260 – Full Service – Working Mode USB & Comport & Cstool Box
    • MTK6261 – Full Service – – Working Mode USB & Comport & Cstool Box
  • Old models:
    • MT6250 – Full Service – Working Mode USB & Comport & Cstool Box
    • MT6251 – Full Service – Working Mode USB & Comport & Cstool Box
    • MT6252 – Full Service – Working Mode USB & Comport & Cstool Box
    • MT6253 – Full Service – Working Mode USB & Comport & Cstool Box
    • MT6255 – Full Service – Working Mode USB & Comport & Cstool Box
  • Other models:
    • MTK6223 – Full Service (COM-port or pin-finder is required)
    • MTK62xx – Full Service (COM-port or pin-finder is required)
    • MTK61xx – Full Service (COM-port or pin-finder is required)
SPD Smart Phones
  • SC6820 – Full Service (including direct pattern unlock, phone pass code, Google lock)
  • SC8810 – Full Service (including direct pattern unlock, phone pass code, Google lock)
  • SC7701 – Full Service (including direct pattern unlock, phone pass code, Google lock)
  • SC7702 – Full Service (including direct pattern unlock, phone pass code, Google lock)
  • SC6825 – Full Service (including direct pattern unlock, phone pass code)
  • SC8825 – Full Service (including direct pattern unlock, phone pass code)
  • SC7715 – Working on it (update as soon as next SPD version)
  • SC7730 – Working on it (update as soon as next SPD version)
  • SC7731 – Working on it (update as soon as next SPD version)
  • SC8830 – Coming soon
SPD Features phones
New models:

  • SC6530 – Full Service
  • SC6530 – Full Service
  • Old models:
    • SC6600D – Full Service (USB Cable,COM-port,pin-finder is required)
    • SC6600M – Full Service (USB Cable,COM-port,pin-finder is required)
    • SC6600R – Full Service (USB Cable,COM-port,pin-finder is required)
    • SC6600I – Full Service (USB Cable,COM-port,pin-finder is required)
    • SC6600H – Full Service (USB Cable,COM-port,pin-finder is required)
    • SC6800 – Full Service (USB Cable,COM-port,pin-finder is required)
    • SC6600L – Full Service (USB Cable,COM-port,pin-finder is required)
    • SC8800D – Full Service (USB Cable,COM-port,pin-finder is required)
    • SC8800H – Full Service (USB Cable,COM-port,pin-finder is required)
    • SC6610 – Full Service (USB Cable,COM-port,pin-finder is required)
    • SC8800G – Full Service (COM-port or pin-finder is required)
    • SC6800H – Full Service (COM-port or pin-finder is required)


CS-Tool Dongle V1.37 Download

CS-Tool Dongle V1.34 Download

CS-Tool usb Driver Download

CS-Tool Activator Download

Monday, November 23, 2015

How to find DIRECT EMMC PINOUT. Step by step with pictures

How to find DIRECT EMMC PINOUT.

Attention! This way is not safe for working pcb.

For pinout find need:

Quote:

Wednesday, November 11, 2015

iphone 6 full short Done by ZAKIR GSM


Note 5 LCD CHANGE Done👍


Tuesday, November 10, 2015

Smart watch No power Done

Smart watch 

icloud unlock service ZAKIR GSM

icloud  unlock  service 


Tuesday, July 7, 2015

iOS 8.4 with TaiG 2.2.1 & Install Cydia

Jailbreak iOS 8.4 It has been some hours since the release of TaiG 2.2.1, and it was updated to support the iOS 8.4 firmware. Just as the previous versions of this tool, this version is compatible only with Windows, so either a virtual machine or a Windows machine needs to be used.
We’re going to brief a tutorial on how to jailbreak your iPod touch, iPad, or iPhone on the firmware iOS 8.1.3 - iOS 8.4 using TaiG 2.2.1.

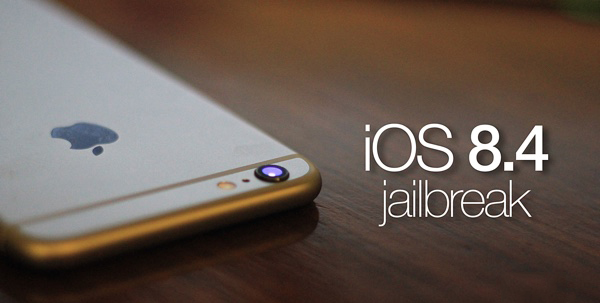
IOS 8.4 Jailbreak for iPhone, iPad & iPod Touch

It’s not a difficult or lengthy jailbreak process, so if you get the instructions right, it should take only a few minutes.
iOS 8.4 Jailbreak
Note: This walkthrough requires a Windows computer or a virtual machine running Windows. There should be the latest version of iTunes installed for this process to work.
You need to have passcode lock, location services, and Find My iPhone switched off before starting. Your device also needs to be in Airplane mode. It’s even better if a fresh iOS install is used, and the device should be rebooted before starting. Also make sure iTunes has recognized the device before the process.

iOS 8.4 Jailbreak Guide

Steps to Jailbreak iOS 8.4

Step 1: Download TaiG 2.2.1 from our link, save it and extract it on the desktop.
Step 2: Connect the device running iOS 8.4 to the PC.
Step 3: Open TaiG 2.2.1
Step 4: Uncheck the checkbox for 3K assistant.
Step 5: Select ‘Start’ to start the jailbreak.
After the jailbreak process completes, open Cydia and begin the initialization process. The good thing about iOS 8.4 and TaiG 2.2.1 is that the existing version of Cydia substrate continues to work out of the box, so there are no waits or workaround to ensure until your favorite tweaks can be used. This said, you need to update and enable some tweaks before you can enjoy them.
What are your thoughts? Did the process work for you? Feel free to leave comments.

Thursday, December 25, 2014

samsung galaxy s3 imei null null baseband unknown Done 100% ...:::ZAKIR GSM:::...


       More infor

Monday, December 22, 2014

success fully Change Galaxy S III glass By separator machine


Download iOS 8.1.2 Links For iPhone, iPad, iPod touch

iOS 8.1.2 Download Links:

Sunday, December 21, 2014

Samsung i9070 Auto Restart Problem 100% Done

Downloads:
  • First of all download the following Gingerbread firmware for Galaxy S Advance GT-I9070. The provided 7zip file contains all required stuff (see below), such as the Odin3 tool and the PIT file. Having downloaded it, extract the file on your desktop : Download Firmware and Tools   —  Mirror Link


  • In case you have the 16 GB variant of the Galaxy S Advance, download the following re-partition file with .pit extension: GT-I9070_EUR_XX_16G_20111228_KL8.pit
  • Download and install Samsung USB Drivers on your computer: Download
Preparations:
  • Back  up your phone,s contacts, messages, apps, call-logs because downgrading will wipe all data present on the internal storage of your phone. Use these apps for backing up all data.
  • Charge your phone’s battery to the full of its capacity.
  • Open Settings> Developer Options and turn on USB Debugging mode.
  • You must also have the USB cable that came with your phone.

Downgrading to Gingerbread on Galaxy S Advance

Make sure you have made all required preparations mentioned above and have the downloaded files on your computer, and then proceed to follow the following steps carefully.
  1. Turn of your Galaxy S Advance, and put it into Download mode. If you do not know how to do it, here is the method: press and hold Volume Down + Home + Power buttons simultaneously for about 3 seconds till you see a warning screen. Then press the Volume Up key and your phone will enter Download mode.
  2. Now open the firmware package you downloaded and launch Odin3 v1.85 as administrator. When it is opened, connect your phone to computer using the USB cable.
  3. Wait till Odin detects your phone and when it does it, the ID:COM port will turn yellow.
  4. Now click on PDA button on the Odin tool, navigate to the firmware folder and select the file with CODE in its name: CODE_GT-I9070_I9070DXLD1_CL1068093_REV00_user_SEC_KEY_LD1_8G.tar.md5
  5. Next, click the CSC button and select: CSC_GT-I9070-MULTI-CSC-OLBLD1_SEC_KEY_8G.tar.md5
  6. Then, click the PIT button and select the .pit file depending on your phone’s memory (8 or 16 GB). Ours is the 8 GB version so we selected: GT-I9070_EUR_XX_8G.pit
  7. Next, make sure that “Re-Partition”, “Auto Reboot” and “F Reset Time” options are checked on Odin.
  8. Now you are just a click away from rolling back to the Gingerbread firmware on your Galaxy S Advance. Just click the Start button and wait till the installation is completed.Galaxy-S-Advance-Downgrage-GB-Odin-pass
  9. Finally, you will get a PASS!! message with green color indicating that the firmware has been flashed successfully. Your phone will then reboot automatically and it will have the newly installed Gingerbread firmware now.

What If I Get a Bootloop after Downgrade:

Well, we have tested this method and it worked without any mishap or hindrance but it is not necessary that things go nice for everyone. In case you phone does not boot properly even after getting PASS!! message at Odin, follow the following troubleshooter:
  1. Pull out your phone’s battery, wait for a minute and reinsert it back to its place.
  2. Then boot your Galaxy S Advance into recovery mode: press and hold Volume Up + Home + Power keys for about 5 seconds till the Samsung logo with device name blinks for 2 times followed by a black screen with an Android bot and blue menu. This is called stock recovery mode and here you will have to use the Volume keys to scroll and highlight options and the Power key to select them.
  3. Now scroll down to “wipe data/factory reset” option and confirm your selection.
  4. Next scroll to “wipe cache partition” and wipe it too.
  5. Finally select “reboot system now” option.
Your phone should boot now and if it is still stuck at bootloop, try installing the firmware again and more carefully. Remember, if you encounter an error, it’s most probably a mistake made on your part.

Installing Official GB Firmware for Your Country:

In case, you wish to install the official firmware meant for your own country, download the Gingerbread firmware from here and install it using Odin. To find the firmware for your country, open the firmware site, press Ctrl+F and type the CSC code for your country/region. To find the CSC code for your country, Click Here.
There will be some difference in the above procedure to install regular firmware. Here are the quick steps:
  1. Download desired firmware.
  2. Make all preparations as directed above.
  3. Enter device into Download mode
  4. Launch Odin3_v1.85.zip  and connect the phone to PC.
  5. Click on PDA button and select the file with .tar.md5 extension.
  6. Hit Start button.

So this was our easy-peasy tutorial for downgrading firmware on Galaxy S Advance GT-I9070. If our attempt helped you, do not forget to share your experience with us. For more useful tutorials and stuff on Android, join us on Facebook, Google+, or Twitter. Cheers!

Friday, December 19, 2014

MT65xxb GT-i9190 imei repair Done 10000% By VOLCANO

COM port searching and preloader handshake.
  Connect successfully.
  CPU TYPE:MT6572, E01
  DSP Firmware Version:2000.00.00
  DSP Patch Version:1.0
  Software Version:MOLY.WR8.W1315.MD.WG.MP.V1
  Hardware Version:SANSTAR72_WET_JB3_HSPA_HW
  Audio Version:Unknown
  IMEI1:invalid.      
  IMEI2:invalid.      
>>IMEI success.


Wednesday, November 26, 2014

Uni-Android Tool Beta


                                 Download   Uni-Android Tool Beta Test ZAKIR GSM

Label 3